


So, supply wise, a roll of picture hanging wire (from a hardware store) and about 16 ft of tinsel. The mini tinsel works best with the thin wire. By all means use the big stuff if you want something huge, just remember to increase the gauge of the wire so it's stronger.
Before you start, lay out your word/letter/design to check that you have enough tinsel, it would be terrible if you ran out and ended up with "ho"
Use the wire cutter attached to the roll packaging or a pair of wire cutters if you have them. Cut about two foot sections of wire to start. It is easier to attach two pieces of wire together later. Also, cut a bunch of little 2 inch pieces of wire. You will use these to secure the tinsel to the wire.
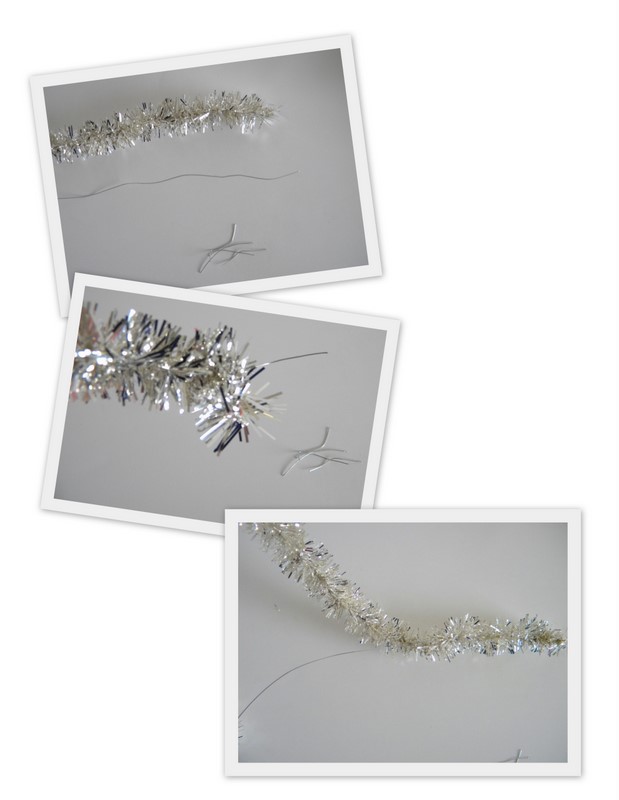
Keep going until you get to the end of the piece of wire. At the end, twist a new piece of wire to join the new section and continue down the line. After you have a large length of tinsel covered wire, start forming your letters. Use the smaller "twistie" pieces to secure the letter formations and any loosened tinsel. Twist, bend, twist.

The thin wire is easy to work with, and forms the letters nicely. The word will still need some support when hanging. I used about 6 push pins to attach it to my wall, placed in the cross of the h's,on e dead center and two on the ends. I did this quickly, in under an hour. You could use a heavier gauge wire, but it might be more difficult to work with.
Wouldn't this be cute as initials for a holiday wedding or a baby shower?
Enjoy and have a fabulous holiday week! Let me know if the pictures are too small to see, I have been having way too much fun with Picasa!


Love this!!!
ReplyDeleteWhat a cute idea! We don't decorate until after Thanksgiving, and now I hope to have extra garland available!
ReplyDeleteSOOOOO cute!!!
ReplyDeletecute idea!!
ReplyDeleteFabulous! Can't wait to try this. Just shared it on my FB page - http://www.facebook.com/AFOMFT.
ReplyDeleteGreat blog thanks for posting this.
ReplyDelete