I have fallen in love…with a program. Adobe Illustrator (AI) can solve a world of problems and create fabulous designs/patterns/graphics. The things I learned from the crash courses from
Alma Loveland at Art Weekend (by
Nicole's Classes) in SLC this past October…have CHANGED my life. I cannot live without Illustrator, nor would I want to. **and yes…my computer with it is still dead…but I got my files off ** Everything you could “want” to do for a party or a little blog (like this one here) can be done with it. But, it’s super expensive. I get that. Until last year, I didn’t have it. So, what’s a girl to do? Use PowerPoint. Really. It takes a bit of patience, especially now that I know how easily I could do this in AI. But, you don’t have AI but you DO have PowerPoint on your laptop or work computer; use that lunch break and whip out some cute flags. Easy. **Bear with me, I have never done a DIY for a computer program.
DIY FLAGS IN POWERPOINT
Open a new presentation, and format the slide to blank. Draw a rectangle roughly the size of the flag.
Now change the shape to an object that you can edit.
Click on the rectangle. In the Menu bar, DRAWING TOOLS> EDIT SHAPE> CONVERT TO FREEFORM
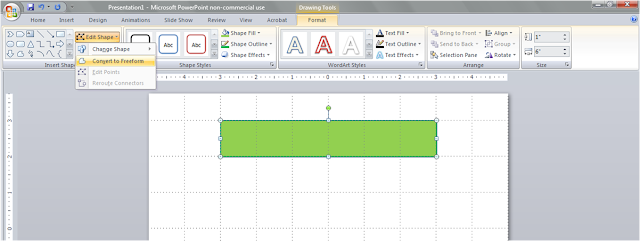
Right click the object and select EDIT POINTS.
Now right click in the center of the left line and ADD POINT. Click and drag the point in towards the center making that cute little cutout that is typical of flags.
Voila. A one sided flag.
Repeat steps 5 + 6 for the other side to make a banner. This style is really popular on blogs lately and I must say I jumped on the train.
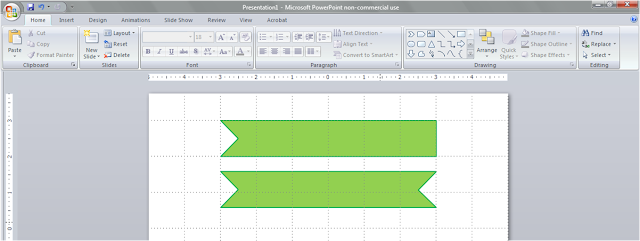
Use these to make little cards or buttons on your blog. You could cut them out and attach to flags for cake toppers, too.
Now, continue to format to make interesting flags.
Starting with a one sided flag. I resized my flag to be a teeny bit thinner. Copy and paste that new flag and flip it over 180 degrees. (I used the little green dot and eyeballed it)
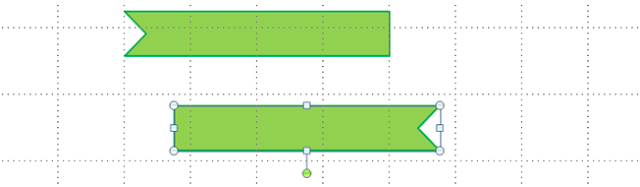 Copy and paste the flag again, but this time leave it right where it gets pasted (on top of the first flag) and right click to EDIT POINTS. Now, click and drag the corners to line up with the corners of the lower flag.
 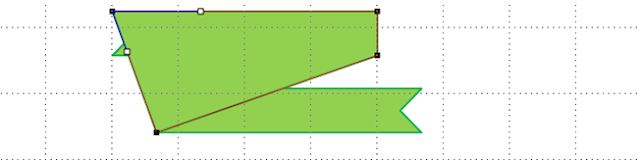 It should look like a parallelogram.
Right click the parallelogram and select SEND TO BACK.
Remove the outline by highlighting the entire shape and DRAWING TOOLS> FORMAT> SHAPE OUTLINE> NO OUTLINE. *I think it looks better without the outline. I also changed the SHAPE FILL of the parallelogram to a darker shade of green. Voila part deux. A little bitty fancy banner.
It should look like a parallelogram.
Right click the parallelogram and select SEND TO BACK.
Remove the outline by highlighting the entire shape and DRAWING TOOLS> FORMAT> SHAPE OUTLINE> NO OUTLINE. *I think it looks better without the outline. I also changed the SHAPE FILL of the parallelogram to a darker shade of green. Voila part deux. A little bitty fancy banner.
Keep going to add more fanciness…
Copy and paste the bottom flag and the parallelogram right below the originals. Edit points if you need to line them up.
PowerPoint is particularly grumpy sometimes (it might just be my relationship with it) about lining things up perfectly. AI doesn’t do this, and is probably one reason it’s a better product for drawing. Just be patient and talk sweet to it and eventually it will let you do what you want. *Sorry, I just sounded like a bad date.*
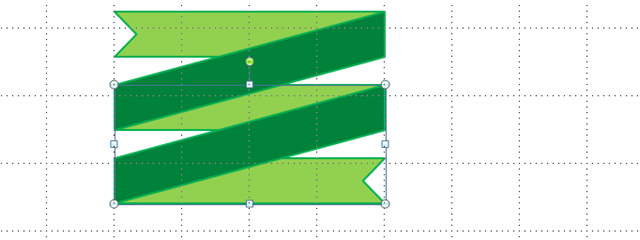
Edit points to bring the top and very bottom flags to add a little shape if you like.
Use text boxes to put words on the flags. I used three different text boxes. **Font used is LiebeErika from
MyFonts**
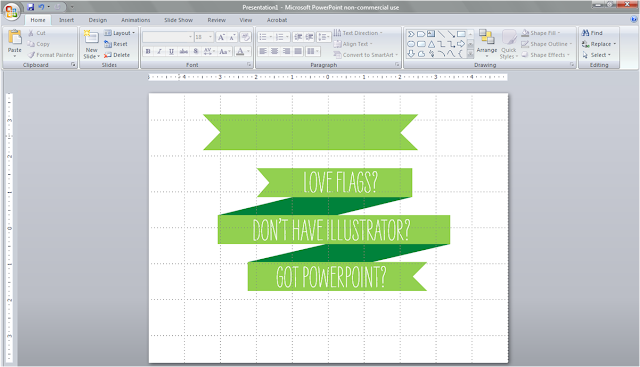
And FINALLY, make it a PNG (much better than a JPEG for graphics – a little trick I learned from
Alma)
15. Highlight the entire shape – make sure you get absolutely everything—and right click SAVE AS PICTURE.
While PowerPoint isn’t designed to be used as a graphics program…in a pinch, it works great. The
Button Baby Shower I did last year was done completely on PowerPoint. You can even get fancier if you know your way around it, it just takes a while longer than AI. Enjoy! Feel free to ask questions! xo


 Posts
Posts


